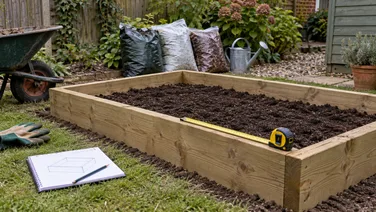
Your raised planter checklist
Work through this checklist before buying timber or compost. Copy the list into your notes, or download the editable raised planter checklist (TXT) to fill in and print.
- Choose what you want to grow and where the planter will stand.
- Decide whether you need a ground-level raised bed or an elevated planter with a base and legs.
- Measure the available space, access route and comfortable reach.
- Choose a suitable design, materials and drainage arrangement.
- List materials and tools, separating what you own from what you need to buy.
- Estimate the full materials cost, including delivery and filling.
- Break the work into stages and choose your first working session.
- Take a before photo, then record progress and your finished planter.
A ground-level raised bed contains soil directly above the garden ground. An elevated planter holds its soil above the ground and needs a structure designed for that weight. A timber bed plan does not automatically work as a planter on legs. Choose instructions for your type of planter before making the shopping list.
Decide what the planter needs to do
Write one sentence describing the result: “A timber raised bed for salad leaves beside the patio, with room to reach every part from the path.” Use that sentence to check whether later choices suit the project.
Then note:
- Which plants you want to grow, their light requirements and suitable growing medium.
- Sunlight at the location, access to water, nearby roots and what happens after heavy rain.
- The external footprint, internal growing area, height and usable filling depth.
- How you will carry materials in, water, weed and reach the centre.
- Whether it will stand on soil or a hard surface, any level changes and the design’s drainage requirements.
- The material and appearance you want, and the maintenance you are willing to take on.
In this example, the space allows a ground-level bed with an internal growing area of 1.2 m by 0.6 m. A planned filling depth of 0.25 m gives a simple rectangular volume of 0.18 m³, or 180 litres. Before ordering, calculate the volume from your design’s internal dimensions and check the growing medium and allowance for settling. This calculation estimates filling volume; it does not specify timber sizes or structural strength.
For detailed bed construction and advice on siting, access and growing conditions, use the RHS guide to making a raised bed. Keep your chosen instructions with the project so you can check details during the build.
Make the materials list before shopping
Take material quantities from the design; a photograph alone won’t tell you how much to buy. Note stock lengths, cuts and fixings before deciding how much to buy.
- Frame material: specification, lengths and quantity.
- Fixings and supports: type and quantity required by the design.
- Base or lining: only where the chosen design calls for it.
- Filling: suitable growing medium and required volume.
- Finish: suitable product, coverage and any preparation supplies.
- Tools: measuring, marking, assembling and filling tools.
- Other costs: delivery, hired tools and waste disposal where needed.
Check your shed first. A borrowed drill or usable leftover material can change the purchase list. Record the quantity and condition of any boards you already own, and check whether they suit the design. Use the DIY materials budget template to compare the planned spending with what you actually pay.
An eight-stage work plan
- Decide requirements. Record the plants, location, access needs and spending limit.
- Measure the space. Mark the footprint, check reach and take a before photo.
- Choose a design. Save the instructions and confirm dimensions, drainage and material specifications.
- List materials. Check existing supplies and calculate quantities from the design.
- Purchase supplies. Confirm delivery access and store materials ready for work.
- Prepare the site. Follow the design's ground or surface preparation instructions.
- Assemble the planter. Follow the construction instructions and photograph progress before filling.
- Fill and finish. Follow the growing-medium guidance, allow for settling where required and take an after photo.
Write down what needs to be done before you can mark each stage complete. “Shopping list checked against the design” is easier to act on than “sort materials”. Check delivery, site preparation and any product waiting times before committing to a weekend build.
Organise it in Handicraft
Create a project called “Patio salad planter”. Put your requirements, dimensions and design link in the description. Add the eight stages as project steps, with any important measurements or checks in each step's description.
Add the purchases to the Shopping list with quantities, estimated row costs and supplier links. Mark purchases as Bought and record their actual costs when they arrive. Keep a record of items you already own in the checklist.
Use the project Before photo for the empty space and After photo for the finished planter. A step can hold one progress photo: choose the picture that best records that stage. After a break, check the next unfinished step and what you still need to buy.
For an indoor project, the furniture upcycling planner uses the same approach for preparation, purchases and progress photos.