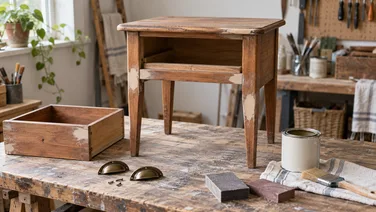
Your furniture upcycling checklist
Use this checklist for the piece you want to upcycle before buying paint. Download the editable furniture upcycling planner (TXT) to keep the decisions, purchases and work stages together.
- Inspect the furniture, including joints, drawers, fittings and surface condition.
- Identify the material and existing finish as far as you can.
- Choose the intended result and suitable preparation and finishing products.
- List repairs, purchases and tools already available.
- Check product instructions for drying, recoating and curing times.
- Plan the work space, ventilation and protection required by the products.
- Take a before photo and choose progress-photo checkpoints.
- Track purchases and actual costs as you work.
Our example is a small wooden bedside table with a sticking drawer, minor surface damage and handles to replace. The goal is a painted finish and a drawer that works smoothly. Use this planner to organise the work, alongside technique instructions that suit the furniture and products.
Check the piece before choosing a finish
Inspect the table first. Does it stand securely? Do joints move? Does the drawer stick because of damage, loose fittings or its existing finish? Photograph any problems and note what you need to investigate.
Check whether surfaces are solid wood, veneer or another material. Preparation that works on one surface can damage another. Note what you know about the old coating and what you need to find out before disturbing it.
Unknown old paint needs particular care. Do not automatically sand or strip it. The HSE's lead guidance explains the risks from disturbing lead-containing paint. Get suitable guidance on the old coating before proceeding, and follow your products’ safety instructions.
Describe how you want the finished piece to look and work: “A pale painted bedside table with repaired surface marks, replacement handles and a smooth-running drawer.” Save the finish colour, product names and reference links. Before buying, check that your preparation method, primer and finish are compatible.
Make the purchase list
For the example table, the list might include cleaner, abrasives, filler, primer, paint, replacement handles and brushes. Choose the items you need from your inspection and product instructions.
For each purchase, record:
- The exact product or specification.
- Quantity and pack size.
- Estimated cost for the whole row.
- Whether it is already available or still needed.
- Supplier link and actual cost once bought.
Measure handle spacing before ordering replacements. Check product coverage and available pack sizes before estimating paint costs. Include consumables and delivery where they apply, as well as the paint.
The DIY materials budget template includes this bedside table as a worked example: £71 estimated and £69 actually spent on materials. The figures are an example of cost tracking. Check current shop prices, products and quantities before setting your own spending limit.
An eight-stage upcycling plan
- Inspect and photograph. Record the condition, material, old finish and repairs needed. Take the project before photo.
- Choose the finish. Save suitable product instructions, colour and handle measurements.
- Check and purchase supplies. Compare the list with what you own and record purchases.
- Prepare the work space. Arrange the ventilation, surface protection and protective equipment required by your chosen products.
- Clean and repair. Follow suitable instructions, resolve the drawer problem and photograph completed repairs.
- Prepare and prime where required. Follow the finish system's instructions and record the preparation in a step photo.
- Apply the finish and allow time. Follow coat, recoat and curing instructions; record the stage with a photo.
- Reassemble and check. Fit the hardware when suitable, check the drawer and take the after photo once ready for use.
Paint can feel dry before the piece is ready to reassemble. Check the manufacturer's curing instructions and allow the appropriate time before handling or using the piece. Include the waiting periods when deciding when to start the next stage.
If inspection reveals a bigger repair than expected, update the plan and budget before continuing. Decide how to handle the repair before buying finishing supplies.
Keep progress in Handicraft
Create a project named “Bedside table upcycle”. Add the intended result, inspection notes, finish choice and instruction links to the description. Turn the eight stages into project steps, and describe what needs to be done to finish each stage. Move each step from To Do to In Progress when you start, then Completed when that work is done.
Add purchases to the Shopping list. Use Needed for items still to buy, save their supplier links and enter estimated row costs. Change each purchase to Bought and enter its actual cost after buying it. Enter quantity for reference and the price for the entire row. Handicraft won’t multiply the price by the quantity.
Add one progress photo to each relevant step. Pick a photo that shows the repair, preparation or finished coat clearly. Use the project’s Before and After photos for a comparable view of the whole piece.
When you return to the table next week, review the last completed step, product waiting times and remaining purchases. For an outdoor project, use the raised planter project checklist for your next garden build.